
How It Works: PDQ Inventory
Purpose
You wish to understand how PDQ Inventory scans target machines. This can be helpful in troubleshooting scanning issues.
Resolution
Scan Profiles
Scan Profiles will need to be created/selected to run against target machines, and a single Scan Profile may contain any number of individual Scanners. These Scanners are responsible for collecting and returning data to PDQ Inventory that can then be utilized in the creation of reports/collections. A few of these Scanners, Files & Directories, PowerShell, Registry, and WMI provide the ability to customize queries in order to scan for specific data that the hard-coded Scanners do not scan for.

Credentials and Scan User
PDQ Inventory Credentials:
PDQ Inventory utilizes three sets of credentials. They can be the same credentials or different depending on the needs of your environment, and the article PDQ Credentials Explained covers these in more detail.
Background Service:
The first set of credentials are the Background Service credentials, located in Options > Background Service. These credentials were supplied when PDQ Inventory was first run.
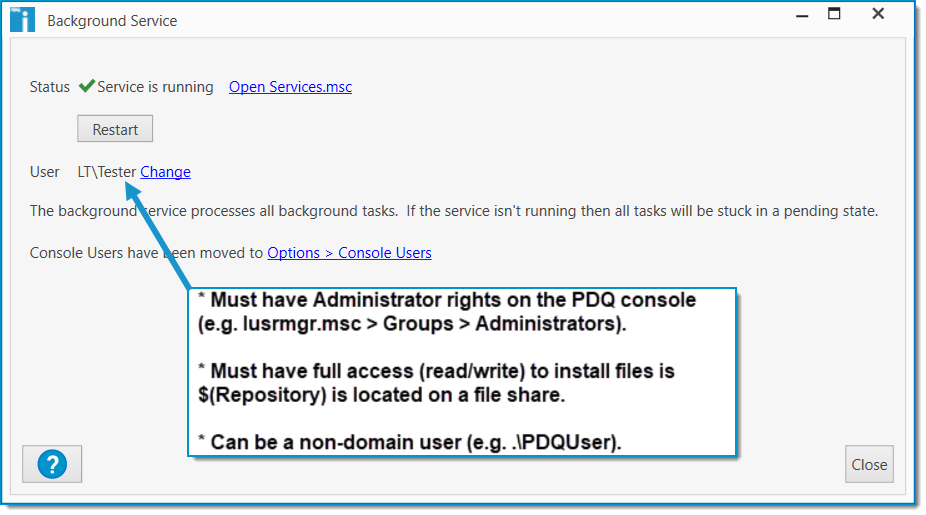
In the above example, the PDQ Inventory Background Service (called Tester) runs under the local user account Tester on the PDQ Server LT.
NOTE: It is not necessary the Background Service credentials have local admin privileges on target machines, but they are required to have local admin privileges on the PDQ console machines regardless whether the consoles are running in Central Server Mode or Local Mode.
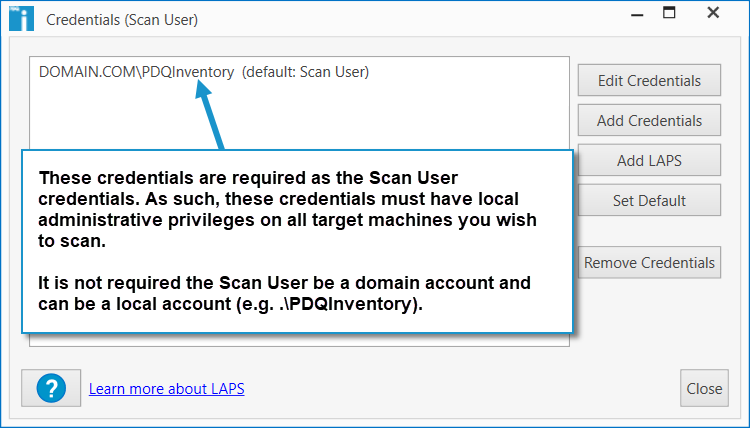
Credentials:
The second set of credentials are the Credentials (Scan User) as found in Options > Credentials. These credentials are the credentials used as the Scan User and runs the scans on target machines via the remote runner service. Scan Users may be set per machine, and this process is covered in this article.
IMPORTANT: As the Scan User, the user(s) in Options > Credentials must be a local administrator on all target machines.
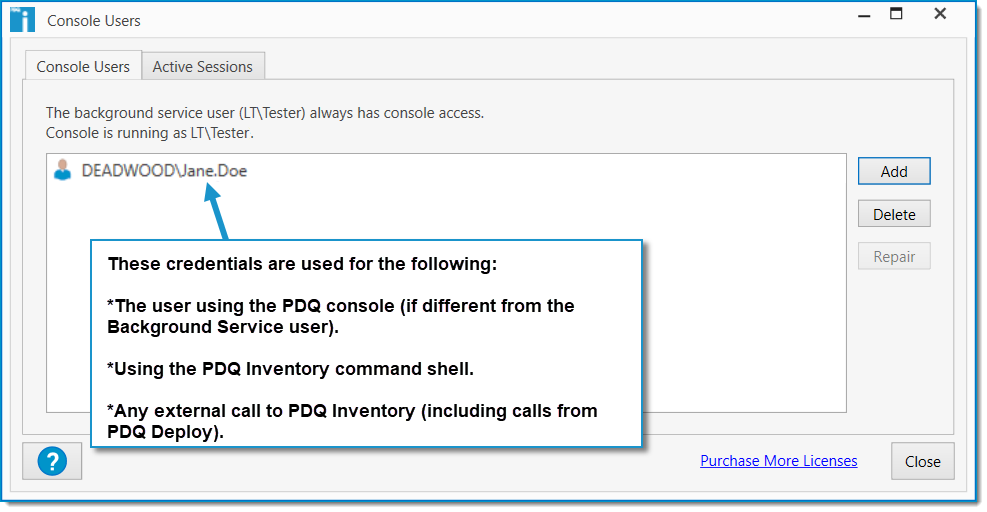
Console Users:
The last set of credentials are Console Users in Options > Console Users. These credentials are necessary if a user will be opening the PDQ Inventory console and that user is not the Background Service user. In this example, we’re opening PDQ Inventory using the deadwood.com\jane.doe credentials and not the LT\Tester credentials. Because of this, it is necessary to have jane.doe listed in Console Users.
NOTES:
- References to the Background Service apply to the Background Service running on the PDQ Inventory console computer. References to the Runner Service refer to the service running on the remote target computer.
- When scanning targets in child/sub-domains using a domain-specific account, OR to targets in a workgroup, it is necessary to Disable Remote UAC.
- For more information on Console Users (Options > Background Service), see Our Handy Video.
- In Options > Credentials, the (default) user credentials are the default scan credentials.
Scanning Steps
When PDQ Inventory performs an action (such as running a scan or executing a remote command) a service and directory is created on the target computer. This directory contains the files which are used to execute the command.
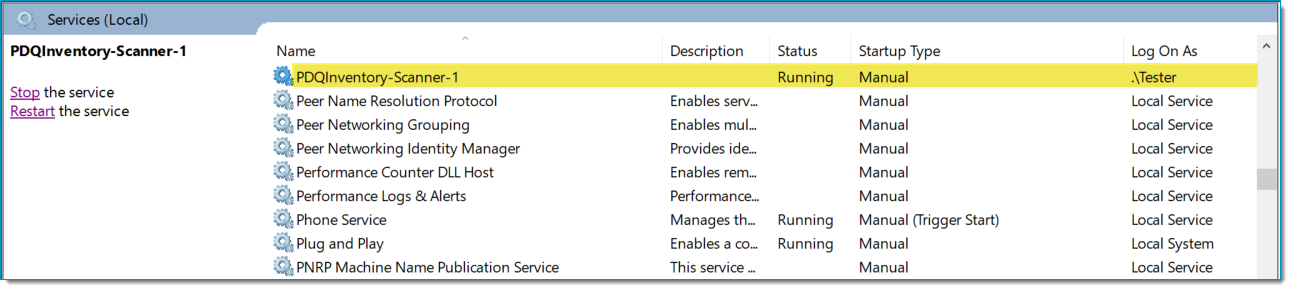
Step 1: A Windows Service is created on each target and is called PDQInventory-Scanner-n (-n will usually be "1"). As explained above, this is referred to as the "Runner" service. The Runner service is set to run under the Scan User credentials. For this example, we've used .\Tester (see image below).
NOTE:
There is a Scan As option available when editing a Scan Profile that changes how the service “logs on”, and may be set to either Deploy User, Local System, or Logged On User. We recommend using Scan User but there may be situations to set this differently like when you need to Scan for AD Info When Using a Local Account (LAPS).
Step 2: Using the Scan User credentials the Background Service attempts to copy the files required for scanning to the following paths:
\\TARGETMACHINE\ADMIN$\AdminArsenal\PDQInventory-Scanner\service-n\
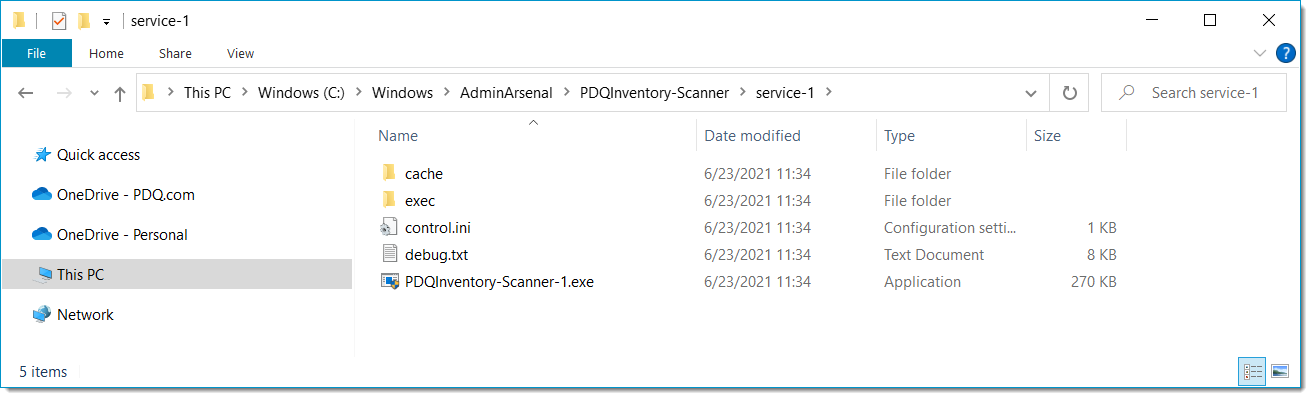
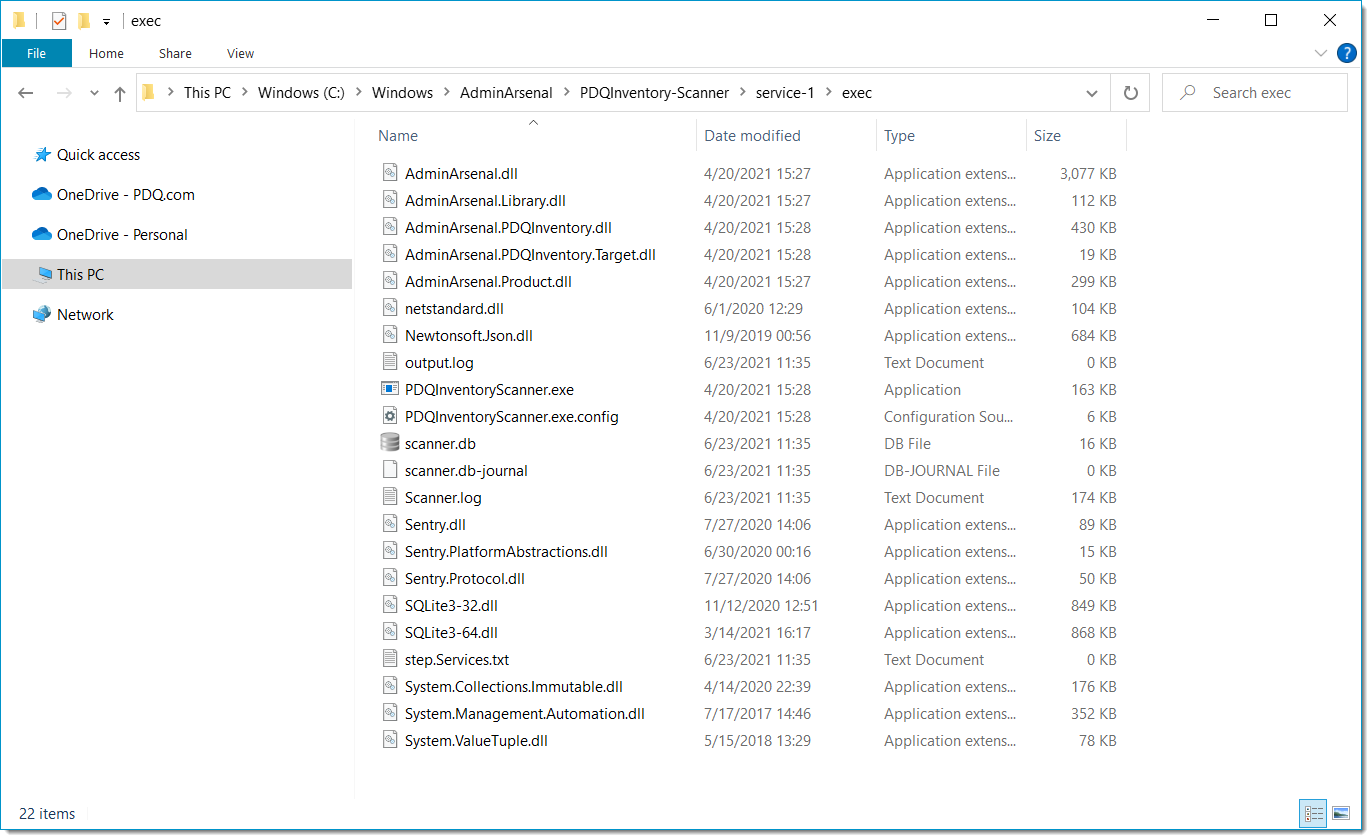
\\TARGETMACHINE\ADMIN$\AdminArsenal\PDQInventory-Scanner\service-n\exec\
IMPORTANT: Some antivirus applications may prevent copying into the ADMIN$ share. You may need to exclude these directories from the antivirus real-time scanning as detailed in the article Recommended Antivirus/Antimalware Exclusions for PDQ Products.
Step 3: The PDQ console computer’s PDQInventory service polls the Runner service on each target waiting for the scan to finish, and updates the Scan Status column as the process moves along.
Step 4: The scan completes and the data is returned to the PDQ Inventory database, which is then reflected in the PDQ Inventory Console.
Step 5: Cleanup occurs, and the previously created directory and service on the target machine is deleted.
The steps are similar when using Remote Commands/Tools or accessing the Processes page from the Computer Details window, except the service names are different, and different files are copied to their associated directories.
Remote Command
Service Name: PDQInventoryRemoteCommand-n
Directory: \\TargetComputer\Admin$\AdminArsenal\PDQInventoryRemoteCommand\service-n\
Processes Page
Service Name: PDQInventoryMonitorStart-n
Directories:
\\TargetComputer\Admin$\AdminArsenal\PDQInventoryMonitorStart
\\TargetComputer\Admin$\AdminArsenal\PDQInventoryMonitor
Note: The PDQInventoryMonitorStart-n service is only briefly created to initiate the connection to the target machine and will not be present after the processes are visible in the PDQ console. Cleanup of these directories is also not as immediate after the Processes page has been navigated away from.
See Also:
Article - How It Works: PDQ Deploy