
How to Create a Basic MSI Package
Purpose
You wish to create a basic MSI package for deployment.
Resolution
To create a basic MSI package, do the following:
- Open PDQ Deploy, select New Package on the top left.
- With Package Properties selected, enter the name of your software next to the Name field.
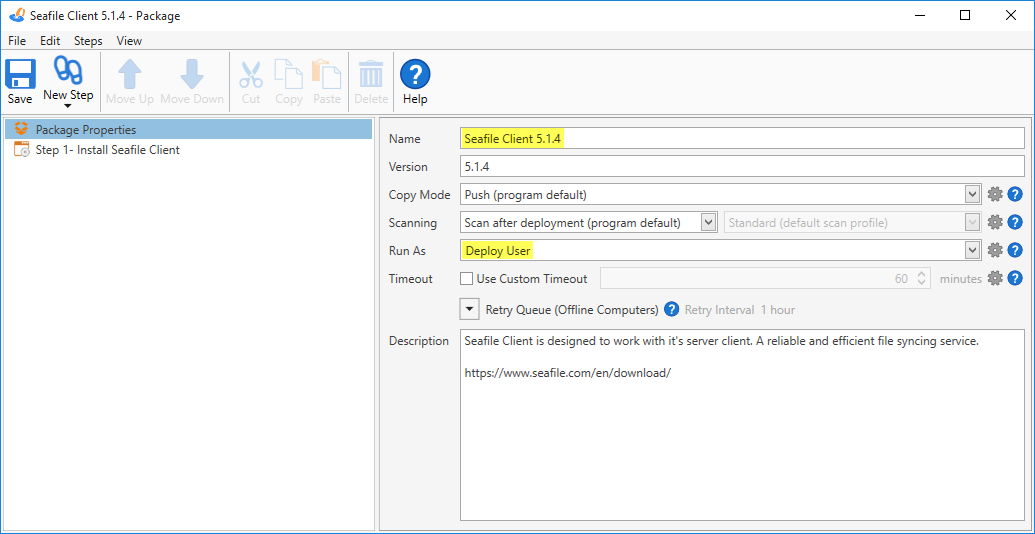
- By default, Deploy User is selected next to the Run As field. Deploy User will be used in most cases. (Note: there are 4 possible options for this field. Each option will run this package using the selected account's permissions. Deploy User, Deploy User (Interactive), Local System, Logged On User.)

- Select Step 1- on the left-hand menu. Enter a name for the Step Title. Browse to your MSI file next to the Install File field. Notice the parameters used next to the Command Line field. These are the default MSI parameters PDQ adds for you automatically. If you select the Custom box, you can delete or add any of these parameters. (Note: most of the time this isn't needed).
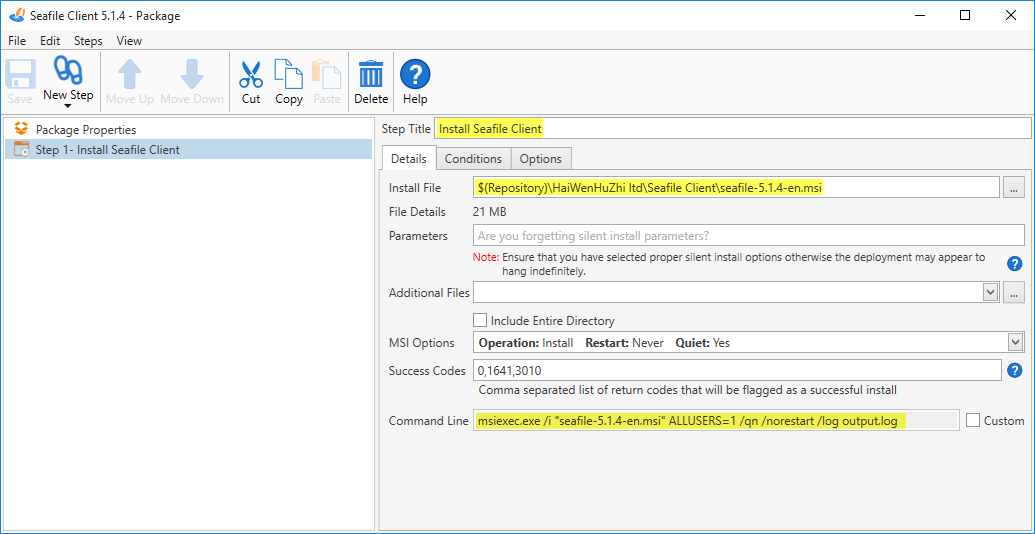
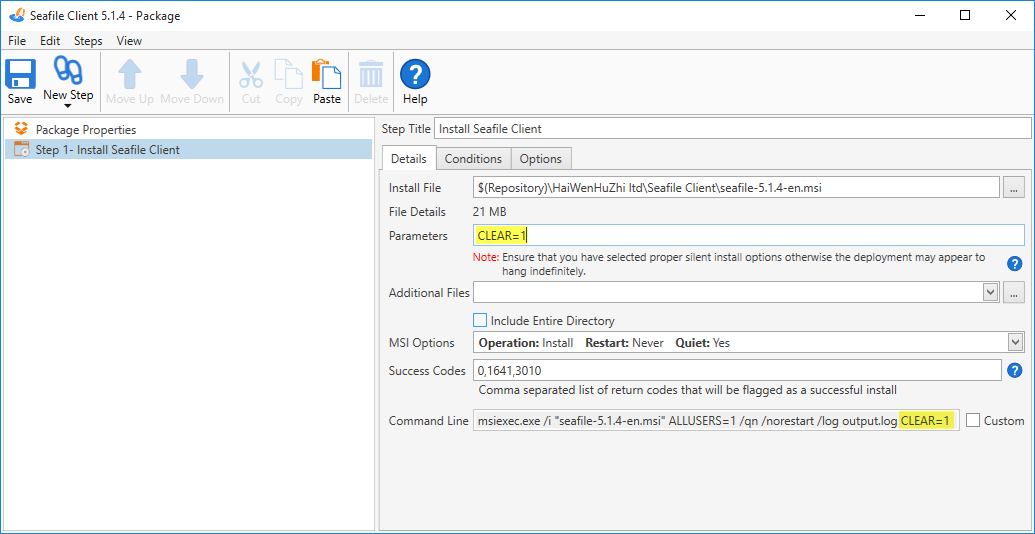
- You can easily add more parameters that your specific install may need by entering them into the field next to Parameters.
- Select the Conditions Tab. Based on your software compatibility, select the appropriate items within the O/S Version and O/S Architecture fields. (Note: the Conditions and Options tabs are only available in the Pro and Enterprise version.)

- Select the Save button on the top left to finish.
Troubleshooting Deployment Issues
If the package deployment fails, please try the following.
- Try installing the package first from Command-Line before adding it to PDQ.
- Machines should be fully patched and not in need of a reboot.
- Clear out %WINDIR%\Temp directory.
- Review the following error codes: http://support.adminarsenal.com/hc/en-us/articles/220530807
See Also
How to Create a Basic EXE Package
Google Fu: The Art of Finding Silent Parameters
Introduction to PDQ Deploy
Installing PDQ Deploy and Your First Deployment
Nate Blevins
Was this article helpful?